Counters are visual objects that allow, in real time, when monitoring images, to know the count of events that are happening.
Counters are incremented or decremented by triggered rules and can trigger events when the value satisfies the conditional rule.
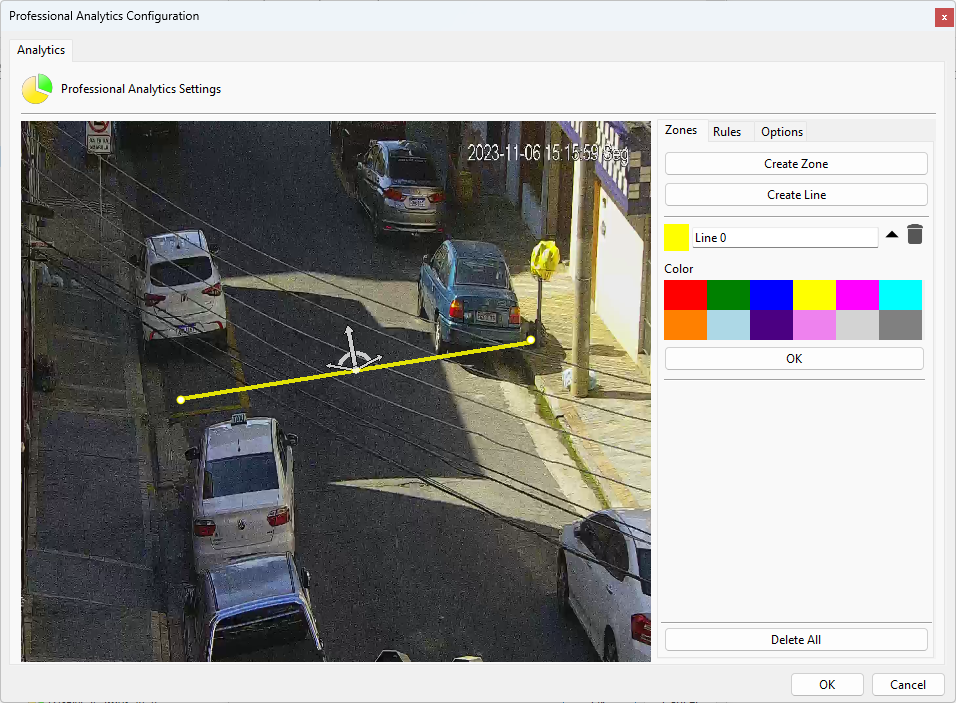
To configure a counter, you first need to give it one or more input rules. In the example below, we have a Direction rule that we will use to increase the counter value when vehicles trigger this rule:
To create the counter, right-click on the image and select the Create Counter option:
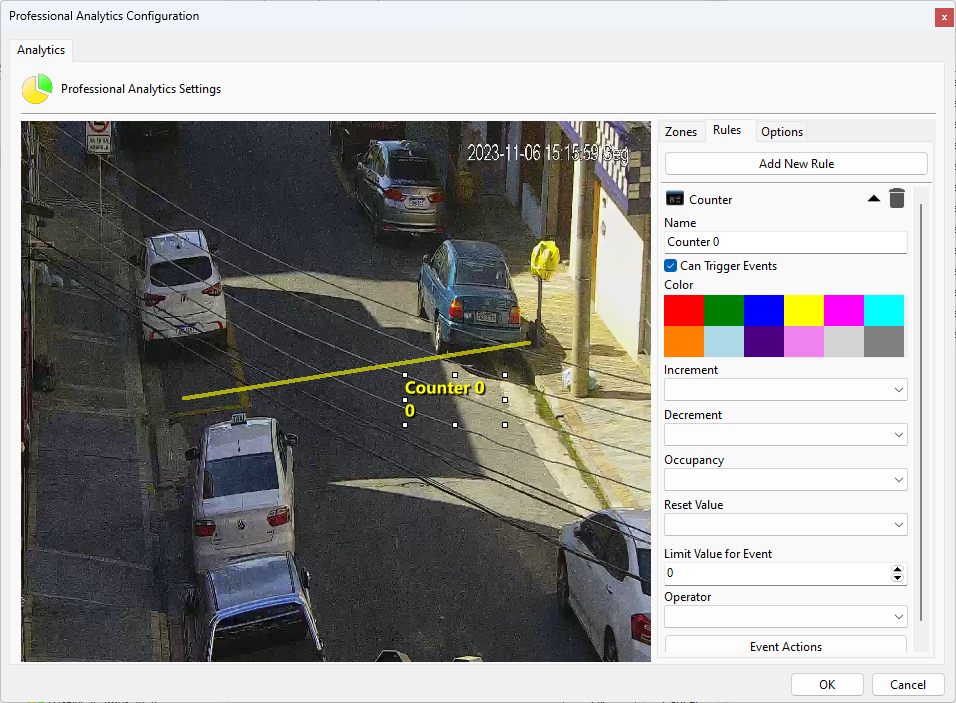
When the counter is created, it will be selected and in the right menu some options are available:
•Name: Counter name.
•Can trigger events: Check this condition with the possibility of triggering events;
•Color: Color of the counter to be displayed on the screen.
•Increment: Which rule(s) will increment the counter when triggered.
•Decrement: Which rule(s) will decrement the counter when triggered.
•Occupation: Which rule(s) will be part of the occupancy condition, which will display the count of rules currently alarmed.
•Reset Value: Which rule(s) will reset the counter value to 0.
•Limit Value For Event: What value should the counter reach for the triggering of actions to occur.
•Operator (none, >, <, >=, <=, ==, !=): Which operator will be taken into account with the limit value (for example: selecting the ">" operator for triggers above a certain limit value or the "!=" operator for when it is different from the selected limit value, etc.).
•Event Actions: Desired alarm actions when analytics trigger events. To learn more about alarm actions see chapter How to configure alarm actions.
For better learning, we will illustrate how to use the resources above.
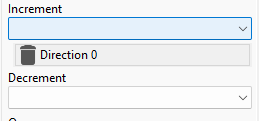
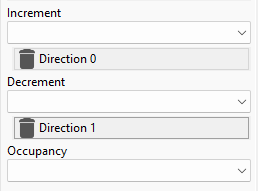
Initially we will just increment the counter with the direction rule we created. To do this, open the Increment option and in Rule select which type of rule you want to increment (In this case we only configured the Direction Filter (Direction 0) so it is the only one available).
After selecting the rule you will notice that it will be added to a list below the selection control. You can add multiple rules to increment, decrement or display occupancy in the counter. To remove a rule, simply click on it (The control is a button).
Now we will create another Direction Filter rule as shown in the figure below:
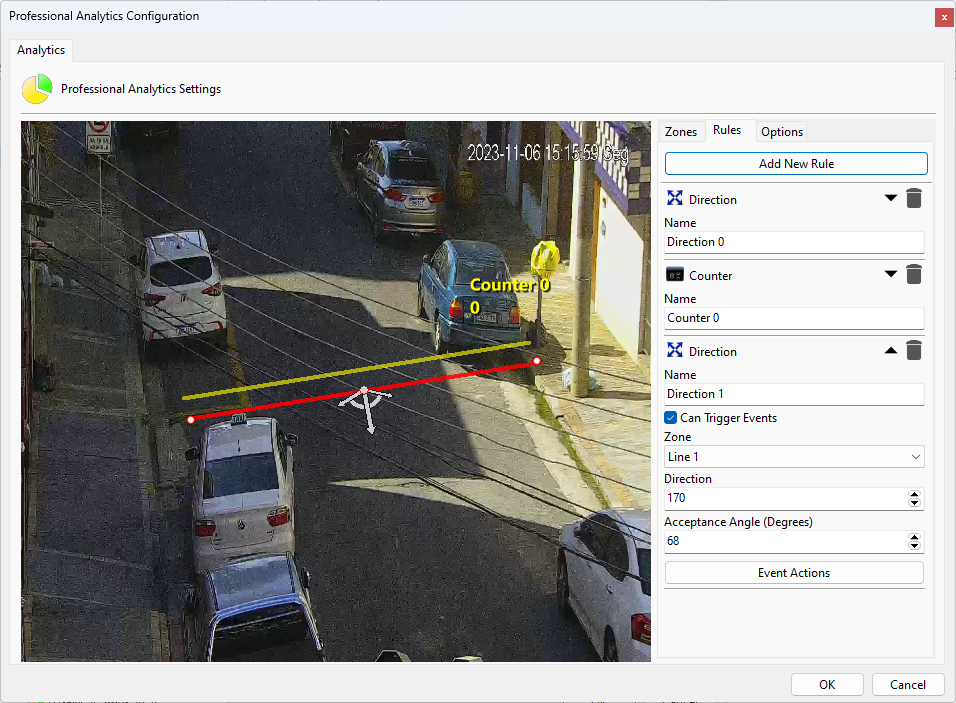
With this Rule we will decrement the counter already created.
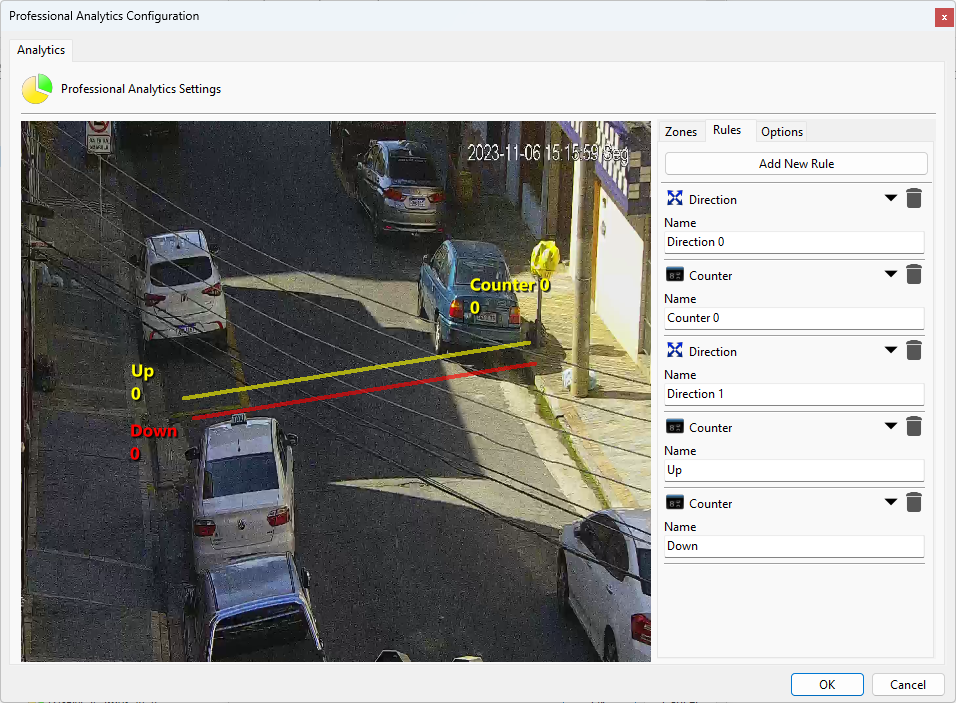
Select it and in Decrement choose the second Zone rule as shown in the figure below:
With this configuration, the Counter will increase when vehicles are traveling upwards and decrease when vehicles are traveling downwards.
There could still be a counter for each line as shown in the figure below:
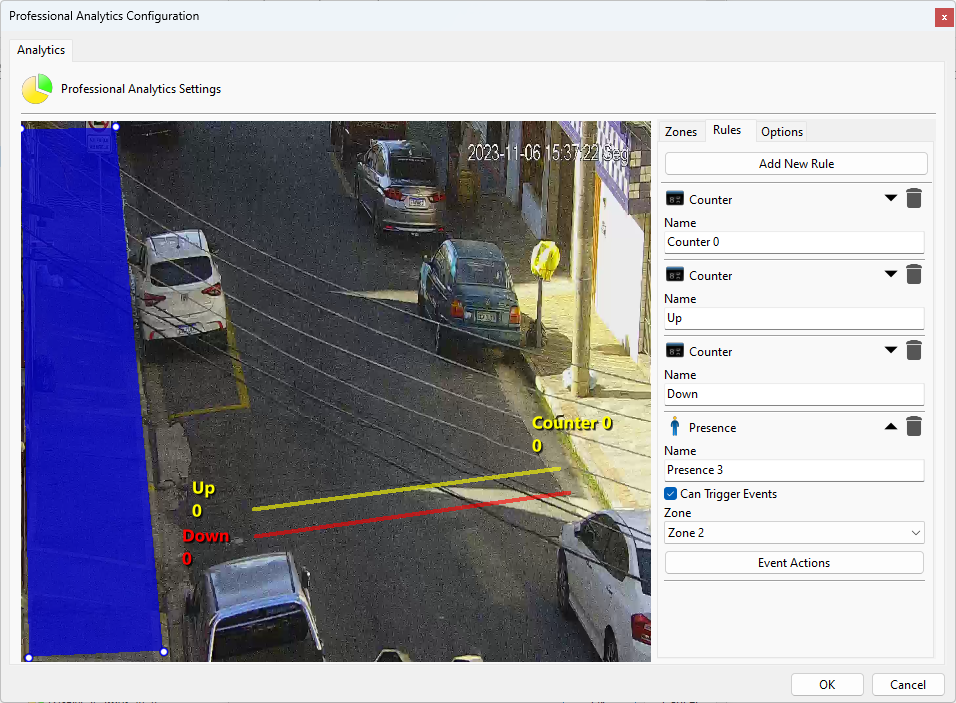
To test the occupancy counter we will create a presence detection area as shown in the image below:
Now a counter will be created that will show the value of how many presence rules are activated within that area, in other words, return how many objects are present at the exact moment within the area. The image below shows this configuration:
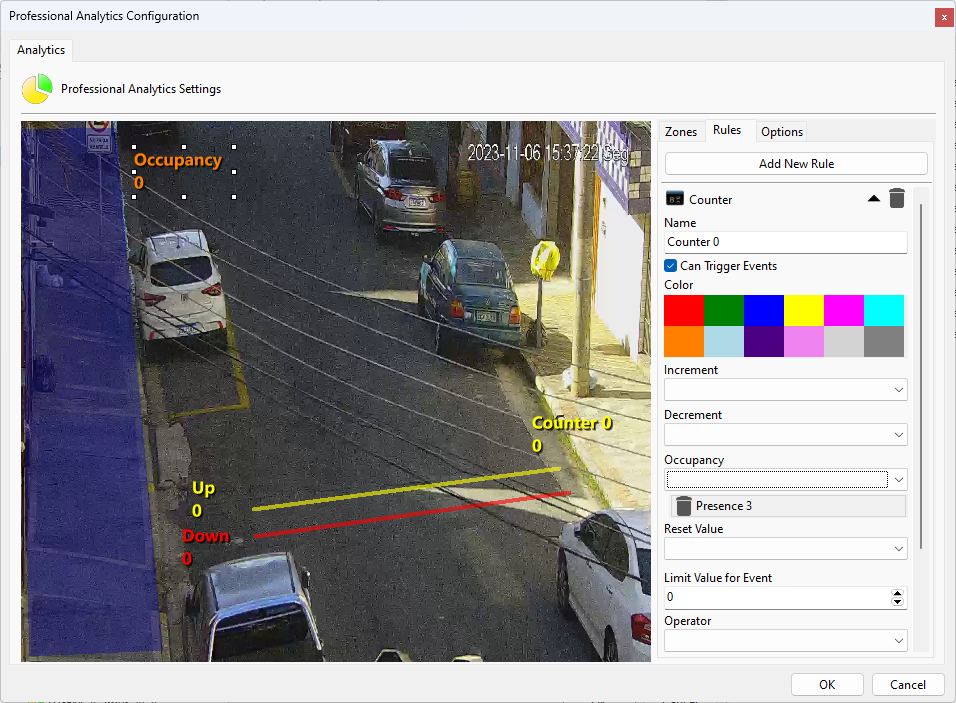
You can configure up to 40 counters per analytics configuration.
The size of the counter can be adjusted by selecting and dragging the squares around it.