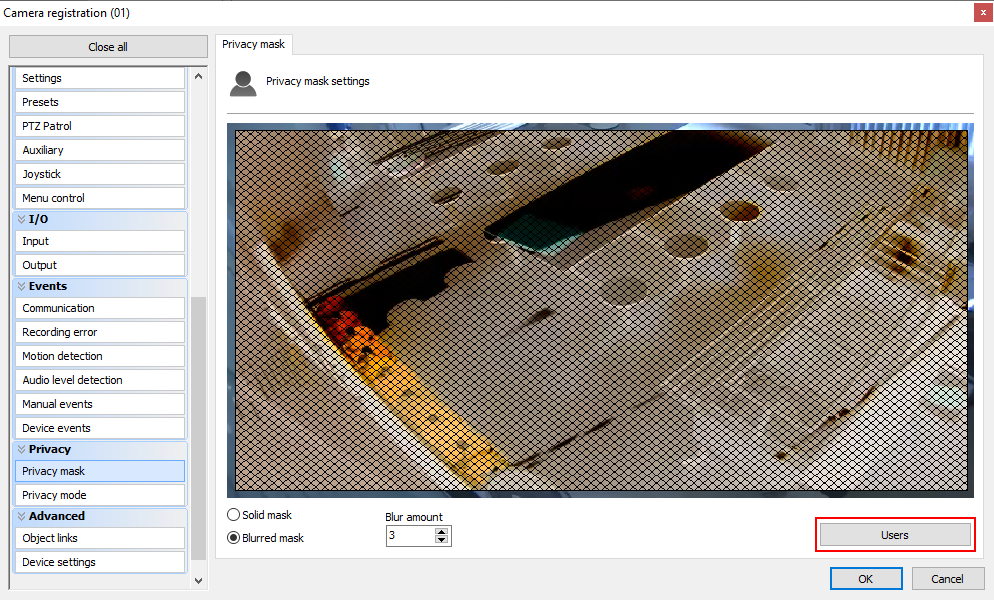
The Privacy Mask consists of a tool that makes it possible to hide areas of the image that cannot be observed by the operator.
It is important to point out that the privacy mask is not saved on the server, on the contrary, the original image is saved and when the image is displayed on the screen the privacy mask is applied.
This feature should only be used on fixed cameras because being an image filter, the mask will not move if a PTZ camera moves, for PTZ cameras you should look for some privacy feature within the camera itself.
To access this feature, click on the Privacy Mask tab, as shown in the figure below:

To add a privacy mask, click with the left mouse button on the image and drag it forming a rectangle. To remove a selected area, right-click a rectangle encompassing the entire area of the mask to be removed, or right-click on the image and select Erase Areas to delete all created masks. By clicking on the Users button, it is possible to define which users or groups of users will be affected by the mask.
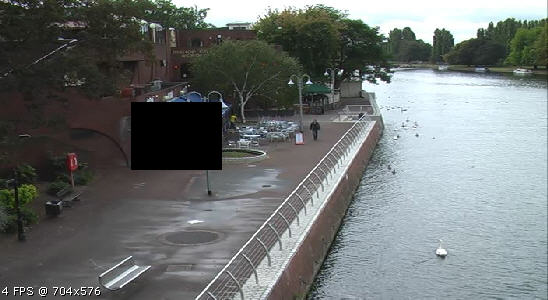
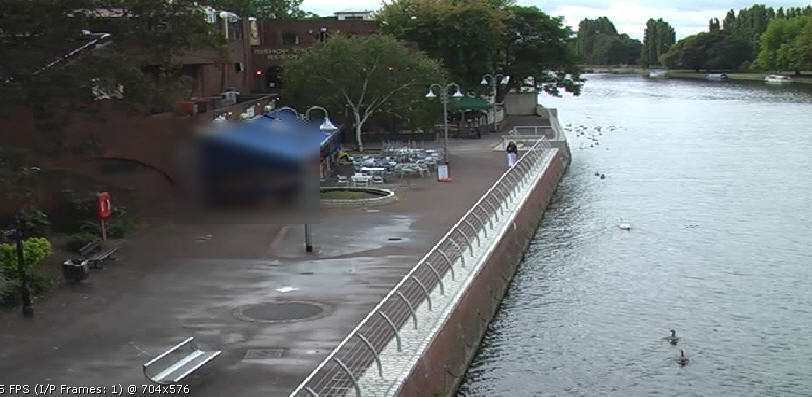
You can select two types of privacy mask: Solid or Blurred.
Solid will generate a completely black mask. The effect of the opaque mask is shown in the figure below:
The Blurred mask can generate a mask with levels of transparency that can be configured within a scale of 1 to 10. The image below shows the application of the blurred mask:
Another usage example:

Privacy Mask can be conditionally applied to specific users / user groups.