To access the LPR server settings, click on Settings as shown in the image below:
The settings screen will be displayed:
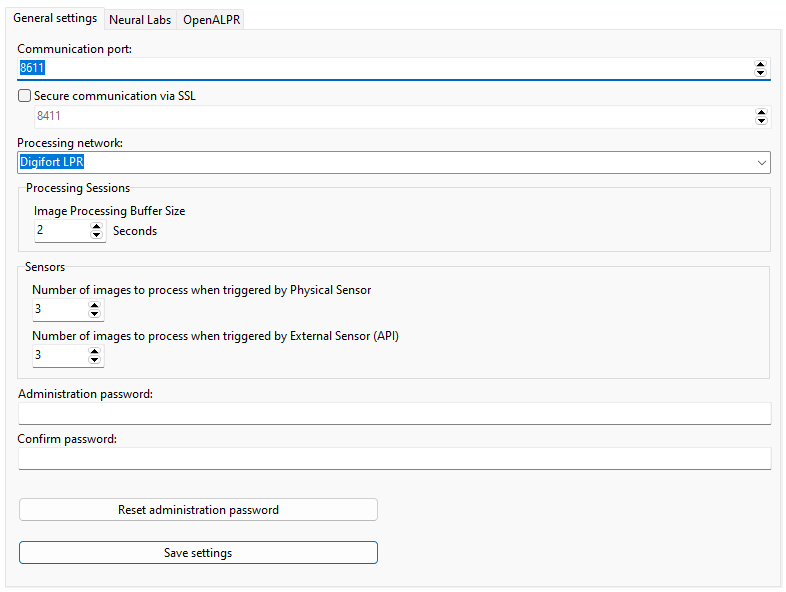
•Communication Port: Communication port with the LPR server. It is only recommended to change if this is already being used on the computer in question.
•Secure Connection via SSL: Enables secure connection to the server via SSL/TLS. To use SSL you must provide SSL certificates. See the SSL Certificates topic for more information.
oPort: Specify the secure communication port
•Processing Network: Name of the distributed network in which this server will load balance. When more than one server has the same "Processing Network" name, processing will be balanced between them. To understand better, see the diagram below:
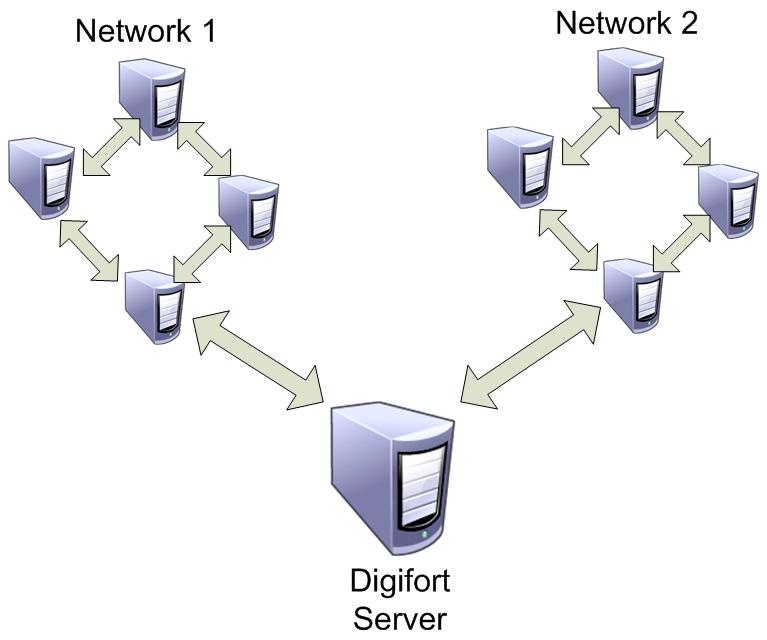
In the image above, the VMS Server sends images from the cameras to two different Processing Networks. This way, each group of computers balances the load only between LPR Servers that have the same network name.
•Image Processing Buffer Size: Specify a maximum size for the image buffer (no seconds) that is used to temporarily store images for processing. During peaks of high CPU usage, the system will use this buffer to prevent images from being lost due to lack of processing capacity, however if this buffer is very large and processing is heavily overloaded, the response latency will be greater (from according to buffer size).
•Sensors: Image processing settings when sensors (physical or API) are used.
oNumber of images to process when triggered by physical sensor: Choose the number of images that the system should process when a physical sensor (Associated Event in LPR Configuration) is triggered.
oNumber of images to process when triggered by external sensor (API): Choose the number of images that the system should process when an external sensor (API call for integration with third-party systems) is triggered.
•Administration Password: Password to access the LPR server. Fill in this field to change the current password.
•Confirm password: Retype the password from the field above.
•Reset Administration Password: Returns the blank password.
•Save settings: Saves the changes made on this screen.