To configure the recording schedule, click on the Recording Schedule button.
The scheduling screen below will open:
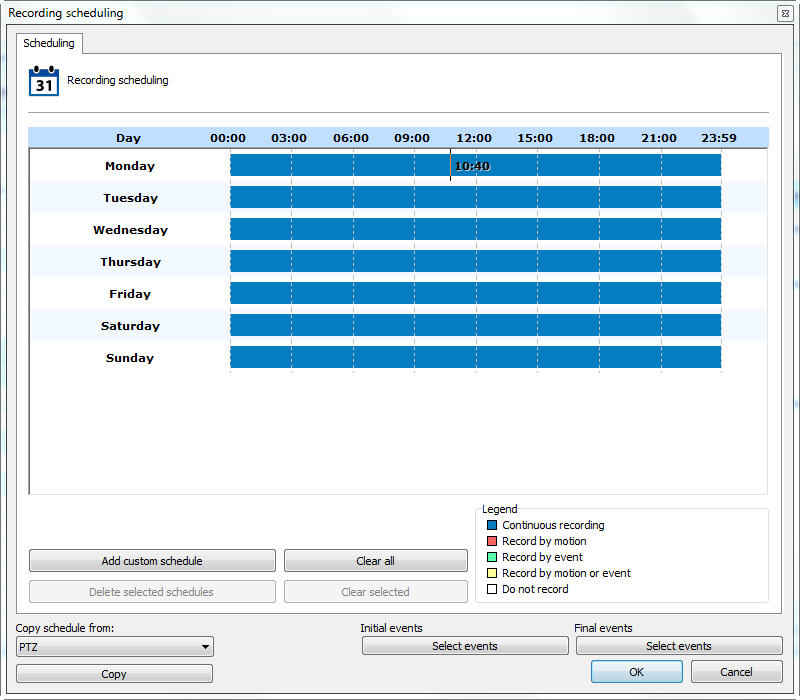
The operation of this screen is standard for all other schedules available in the software.
Initially we have the days of the week and their respective times.
To create a schedule, select the day of the week and keep the left mouse button pressed over some time of the day, dragging it to another time, forming a rectangle. After this action, a window will open asking for the type of schedule to be created, select the most convenient option.

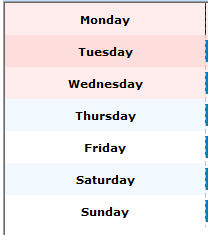
You can select multiple days to apply a setting to all at the same time Just click on the desired days of the week.
In the figure below, the first three were selected:
Scheduling options are:
•Always Record: Enables continuous recording from the camera at the specified time. This option is represented by the color blue.
•Motion Record: Activate camera motion recording at the specified time. This option is represented by the color red.
•Record by Event: Enable event recording of the camera at specified times. This option is represented by the color green.
•Motion & Event: Enables recording by motion detection and camera event detection. This option is represented by the color yellow.
•Do Not Record: Disables camera recording at the specified time. This option is represented by the color white.
•Cancel: Cancels the creation of the schedule for the specified time.
•Button select start events and select end events: If the type of schedule is configured to record by event, click this button to configure the event that will start or end the recording of camera images on the server. When clicking on this button, the following screen will be displayed:
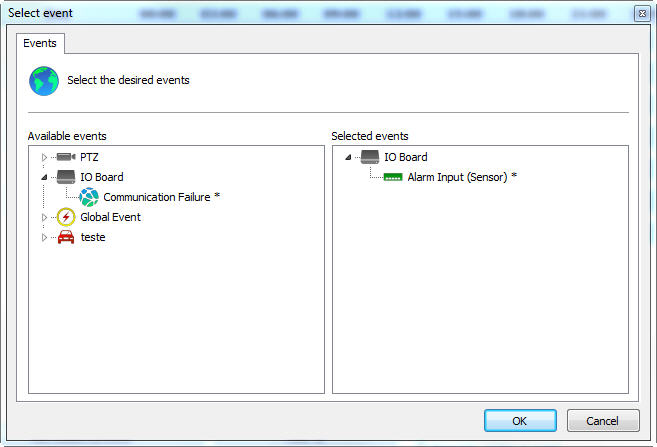
This screen presents two lists, the list of available events and the list of selected events.
The list of available events displays the list of all system objects that trigger events, and the list of selected events displays all events that are selected.
The events that have the “*” symbol next to them are the events that will actually occur, that is, suppose we have chained timer events, in this case it is not all the events that will occur, but the one with the symbol “ *" next to. Timer events are events that occur at a certain user-defined time to trigger another event. To learn about timer events see Timer Events.
To select an event, select it from the list of available events and drag it to the list of selected events. To remove an event, follow the same process in reverse.
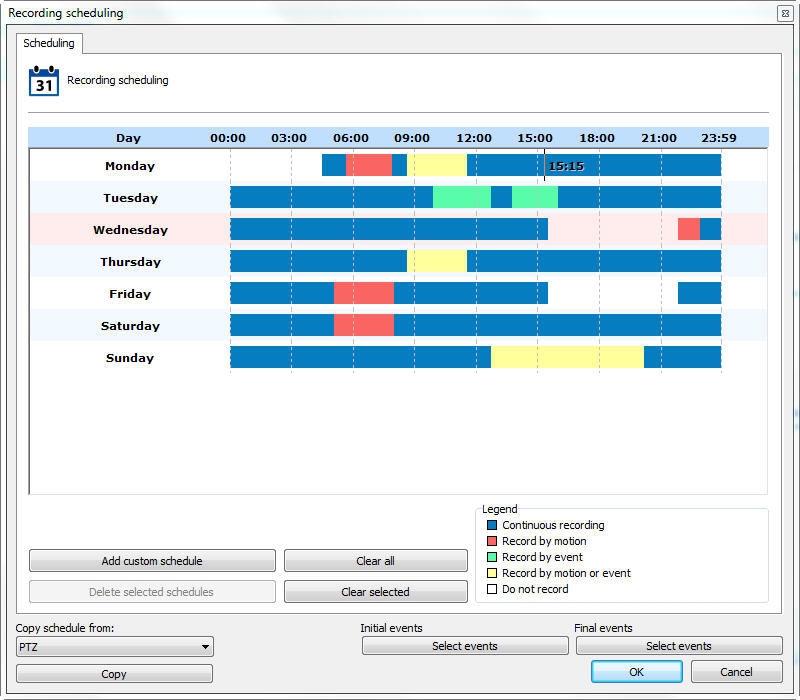
In the image below, we have different types of appointments on different days:
The scheduling screen allows scheduling to be made for a specific day of the year, such as a holiday or a special event.
To add a custom schedule, click the Add custom schedule button.
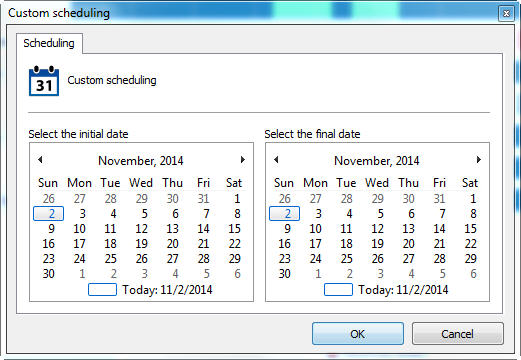
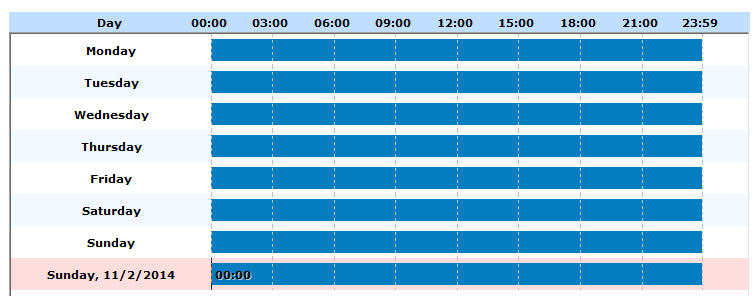
It is possible to choose a single day as shown in the images below:
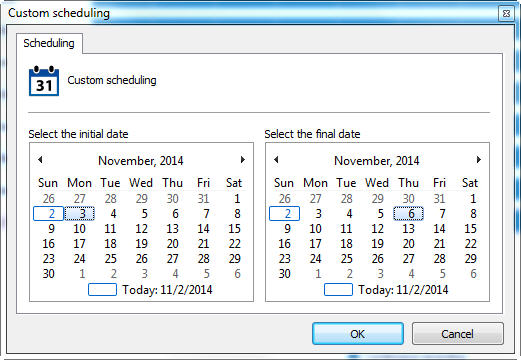
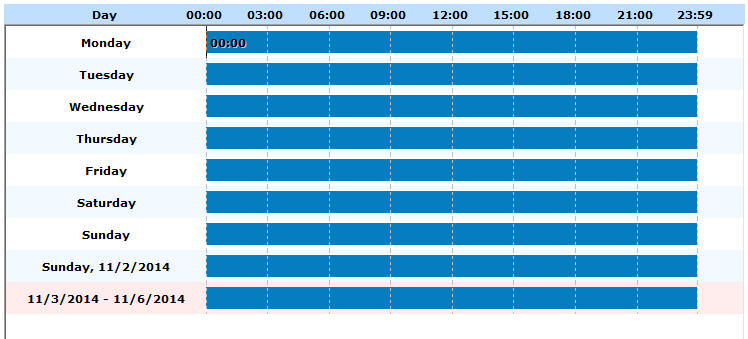
Or add a range:
|
|---|
Custom schedules will have priority over regular schedules. For example: In a custom schedule that is scheduled on a Monday, it will override the settings already made for Monday on that specific day. |
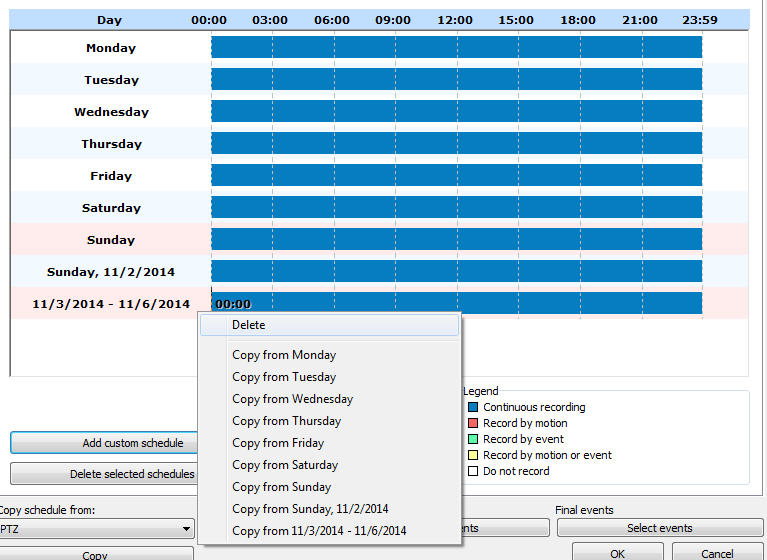
By right-clicking on one or more selected schedules, you can delete custom schedules or copy settings from other schedules:
It is also possible to copy the scheduling of another system object, just select it and click copy:

To delete a custom schedule, select the custom schedule and click "Delete selected schedules"
To return to the default scheduling settings for one or more days, select the desired days and click "Clear Selected"