When you select export in AVI format, the system will open a screen with options for exporting in this format:
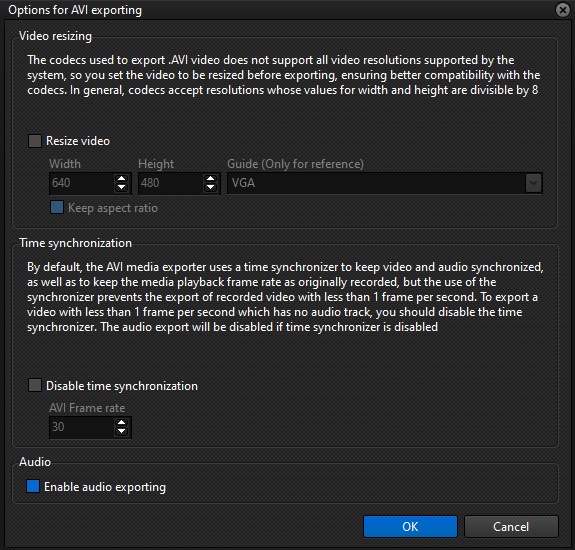
•Resize video: Select this option if you want to resize the video, to decrease its resolution. Some codecs used to export in AVI will not support all the video resolutions that the system supports, so you can activate this option to select a new video resolution to ensure greater compatibility with the codecs. In general, codecs accept resolutions whose width and height values are divisible by 8.
oWidth: Enter the new width of the video.
oHeight: Enter the new height of the video.
oGuide: Instead of providing a resolution manually, you can choose from some pre-registered options.
oKeep aspect ratio: Select this option to keep the aspect ratio of the original video when applying the new resolution.
•Time synchronization: By default, the AVI media exporter uses a time synchronizer to keep the video and audio synchronized, as well as keeping media playback at the originally recorded frame rate, but using the synchronizer makes it impossible to export video recorded at less than 1 frame per second. To export a video with less than 1 frame per second that does not have an audio track, you must disable the time synchronizer. Audio export will be deactivated if the time synchronizer is disabled.
oFrame Rate: When you deactivate the time synchronizer, you must specify a frame rate that will be used when playing this AVI.
•Activate audio export: Select this option to allow the audio to be exported along with the video.
Click OK. The system will then display the export folder selection window:
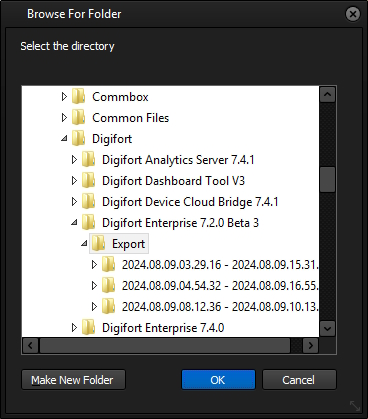
The default folder selected will be the folder configured in the Surveillance Client's General options. On this screen you can choose the folder you want or create a new one.
Once you have selected the folder, click OK. The system will automatically create a subfolder with the start and end dates of the export, and all the material will be saved in this subfolder.
After selecting the export folder, the system will display a new screen with options for adding a watermark to the exported video:

•Watermark: Adds a watermark to the exported images. The watermark will be a text that will be superimposed over the image, using the properties defined below.
oText: Provide the text for the watermark.
oColor: Provide the font color for the text.
oSize: Select the font size.
oPosition: Select the position on the image where the watermark text will be displayed.
Click OK and the system will now display the standard operating system window for selecting the AVI codec:

On this screen you will have to select the desired codec (Recommended x264vfw) and its settings. The codec settings will not be covered in this manual as they are specific to each type of codec installed on the PC.
Click OK and the export will begin.